The most frustrating and cumbersome task is probably ‘spring-cleaning’ your computer (unless you’re in quarantine). This means going through all the files and deleting photos that are taking up space.
This can be an unnecessarily time-consuming process and take up a lot of effort. Using the PictureEcho software to identify duplicated graphic files is a way smarter option.
The PictureEcho application, however, is a more efficient and user-friendly tool that has various features and is compatible with all versions of Windows.
The Process
Besides being an easy-to-use application, PictureEcho is also easily downloadable from its official website. Once you have installed the application on your PC, it’s time you become accustomed to all the various features that the tool provides. Here is a step-by-step guide to teach you how to effectively locate graphic files:
Step 1: Add Graphics Files to PictureEcho
The tool is applicable for certain file(s) that you add. On the top-left corner, you will notice the Add Path option with the Remove Path option below it. You can choose more than one folder to search for duplicate graphics photos.

Step 2: Set Your Preferences
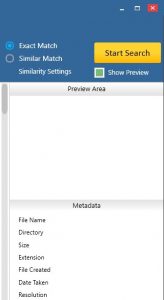
PictureEcho allows you to sort out pictures as an Exact Match or a Similar Match. You will find this option in the top-right corner next to the list of folders that you selected.
There is another adjustment required for the Similar Match scan.
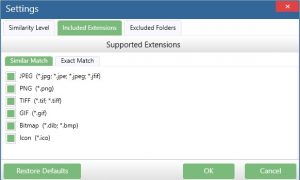
Set the application to search for a given type of graphic file (e.g; jpeg, png, gif) as per your choice. You can do so by going to the Similarity Settings that will open a new window with three tabs – Similarity Level, Included Extensions, and Excluded Folders. Select Included Extensions.
Step 3: Start Search
After you have chosen and specified the type of search, click the Start Search option in the top-right corner next to Similarity Settings. This may take a while depending on the size of the folder(s) chosen.

Step 4: Select Duplicates
Once the search is complete, you will get the results in the center white portion. You will notice that the graphic files are grouped with all similar files in one group.
You can now select the duplicates from each group based on its size, resolution, location, and date from the first of the three identical green boxes in the bottom-right corner namely, Select Duplicates.
Step 5: Select Action
You can choose to permanently delete or move the duplicate files by clicking on the second box named Select Action.
You can clear the results if you wish to start a new search or are done deleting/moving the files.

