You might notice the Windows 10 operating system slows down at times. Here are tips & tweaks to improve your computer’s performance.
Speed Up Windows 10
ST Cleaner is compatible with Windows 10/8.1/8/7/Vista/XP
By clicking to download, you agree to these Terms See Features & Functions
Optimize the Registry
Set the best recommended system Registry configurations to improve boot time performance.
For Windows 10:
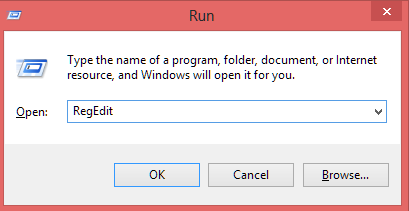
1. Press Windows Key + R simultaneously.
2. Type “RegEdit” and click OK.
3. This opens up a new window. Locate following sub key:
- HKEY_LOCAL_MACHINE\SYSTEM\CurrentControlSet\Control
4. Double click a string named “WaitToKillServiceTimeout”
5. Replace the value with “2500” and click OK.
6. Locate following sub key:
- HKEY_CURRENT_USER\Control Panel\Desktop
7. Double click “HungAppTimeout” and “WaitToKillAppTimeout” strings and reduce their values subsequently.
8. Close the window and restart your computer for the changes to take effects.
Upgrade your Hardware
Ensure you’ve newest set of hardware to avail maximum performance. Upgrade your processor, add more RAMs, use an external hard disk, buy a graphics card if you’re playing games, and so on.
Free Up Disk Space
Delete the temporary and duplicate files to create free space. Windows 10 needs a sufficient amount of free disk space to store temporary contents.
For Windows 10:
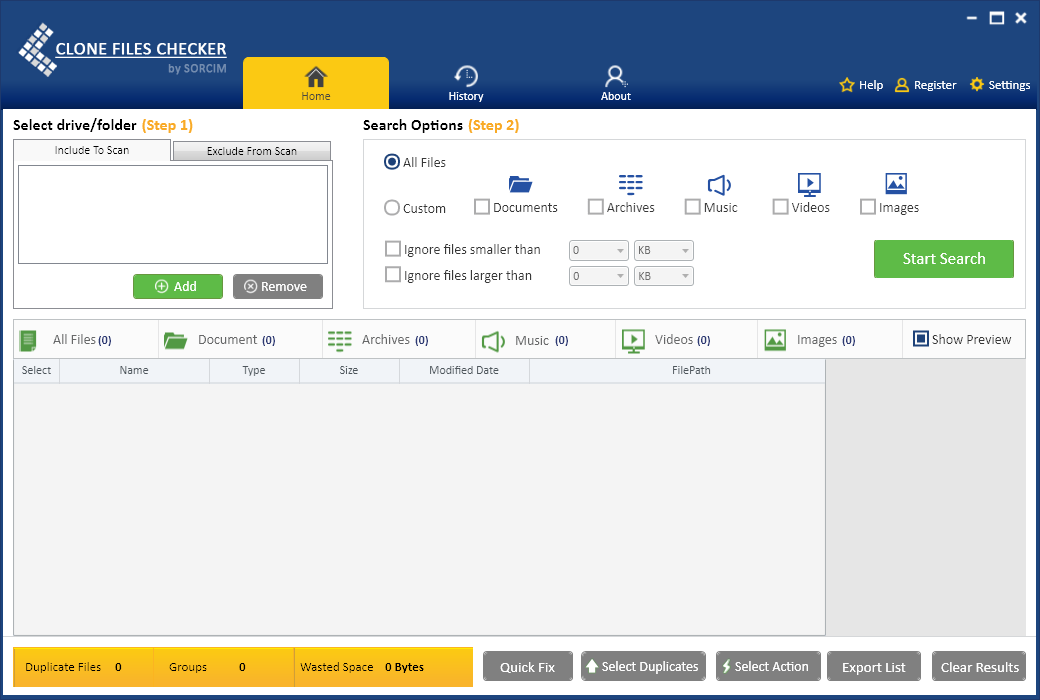
1. Download and install Clone Files Checker.
2. Add new drives/ partitions to the List Box on far left.
3. Customize scan options- select full scan in case you want to include all sorts of file types; or select custom scan if you would like to scan only specific file types. In latter case, check-up the file types. Example: Images, videos, music, documents, archives.
4. Start the scan and use quickly delete all your duplicate files, or simply move them to a new separate folder on your hard drive.
Change Appearance and Performance Settings
Review your computer’s appearance and performance settings to increase the level of virtual memory.
For Windows 10:
1. Fire up Control Panel.
2. In the Search Box located on upper right corner of your screen, type “Performance”.
3. You have now Search Results on your screen.
4. Click “Adjust the appearance and performance of Windows” link under “System” category.
5. This opens up a new dialog named Performance Options.
6. Click Advanced tab.
7. Click Change button under “Virtual Memory” category.
8. Now that you’ve Virtual Memory dialog box on your screen. Uncheck the box named “Automatically manage paging file size for all drives”.
9. Select your system drive, usually C:\
10. Select “Custom size” and specify a higher Paging File Size.
11. Click OK | OK. Restart your PC for the changes to take effects.


